Quickpay integration with nopCommerce makes it easy to get started with accepting online payments.
nopCommerce is a popular open source e-commerce solution. nopCommerce is available for free. A solution with comprehensive features that is easy to use for new online businesses, yet powerful enough for the most demanding e-commerce expert. It is a secure, scalable and extendable e-commerce platform.
Visit www.nopcommerce.com for more information about the system.
3-D Secure compliant
3-D Secure is an authentication method put in place to prevent fraud in online card payments. All European merchants will need to be able to support 3-D Secure 2 by the end of 2020.
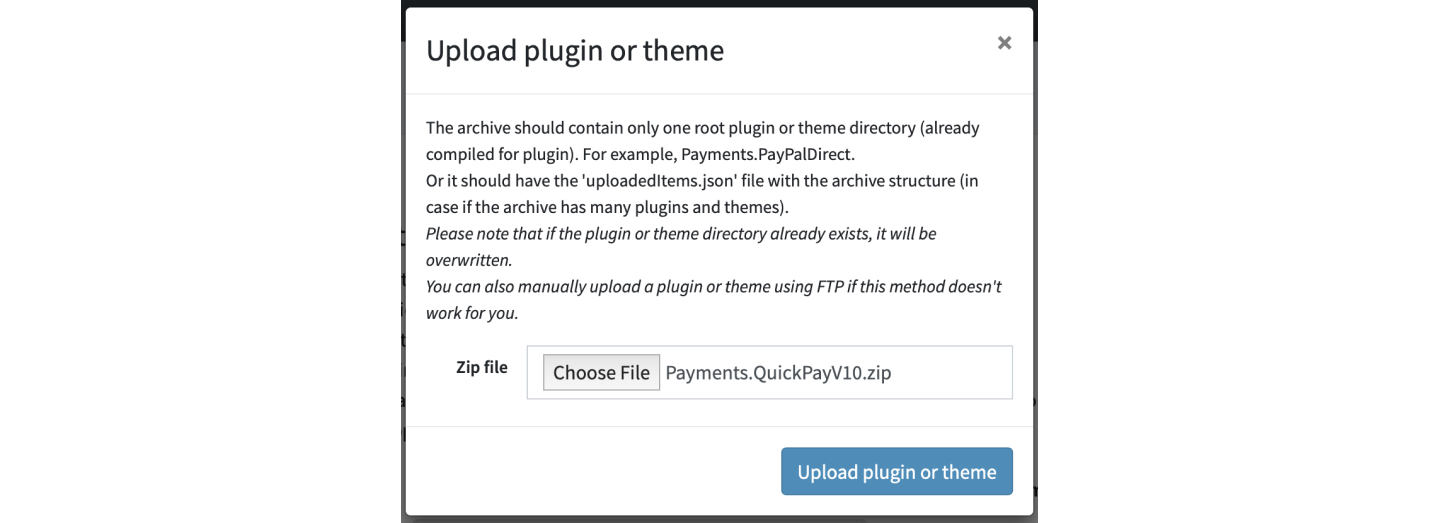
2. In nopCommerce administration, go to Configuration > Local Plugins. Click “Upload plugin or theme” and upload the downloaded file. The application will restart.
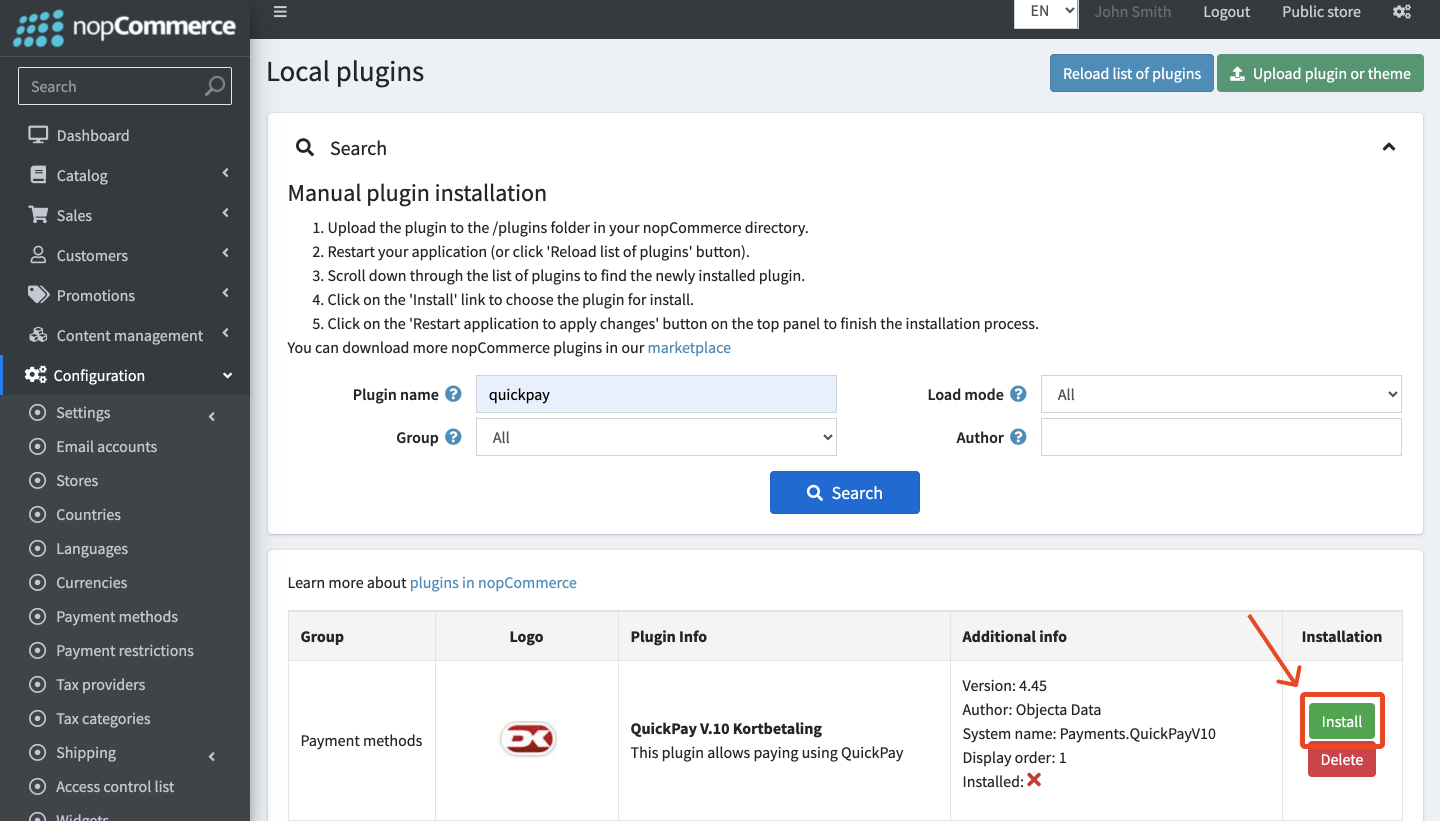
2. Go to Configuration > Local Plugins again and search for Quickpay. Click “Install”. You will be prompted to restart the application again.
3. Go to Configuration > Local Plugins again and search for Quickpay. Click “Configure”.
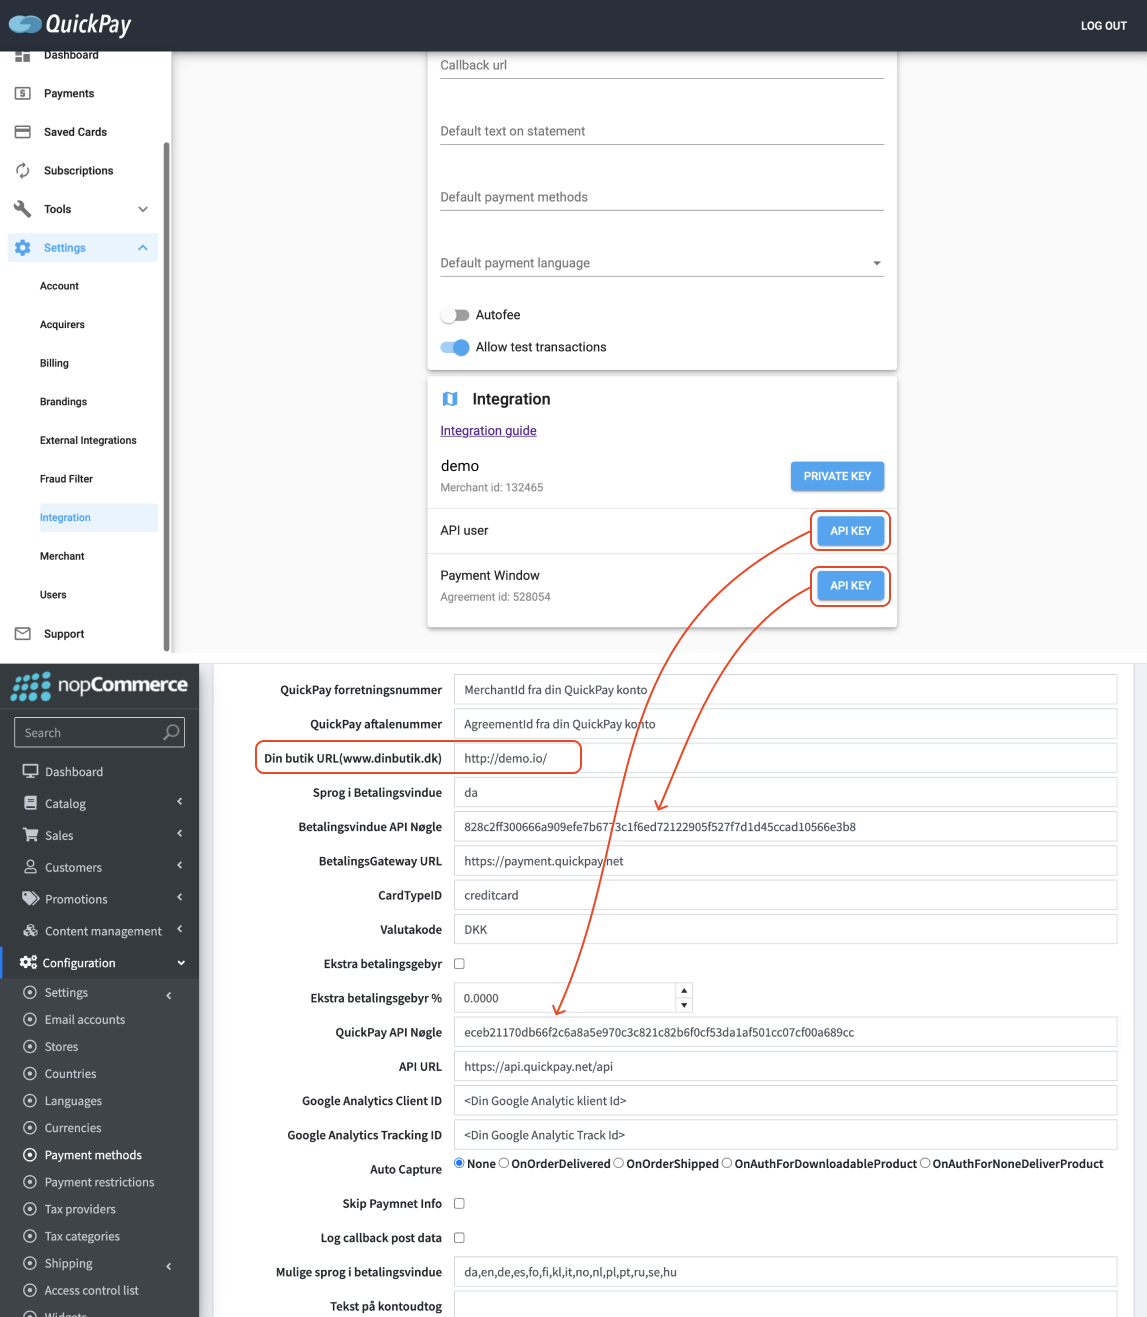
4. In Quickpay Manager, make sure you have selected nopCommerce in Settings > Merchant > Shop system. In the Manager, go to Settings > Integration, find “API user API KEY” and insert it in nopCommerce under Quickpay API Nøgle, and “Payment window API KEY” and insert it under Betalingsvindue API Nøgle. Insert your shop’s url under Din butik URL. Click “Save”.
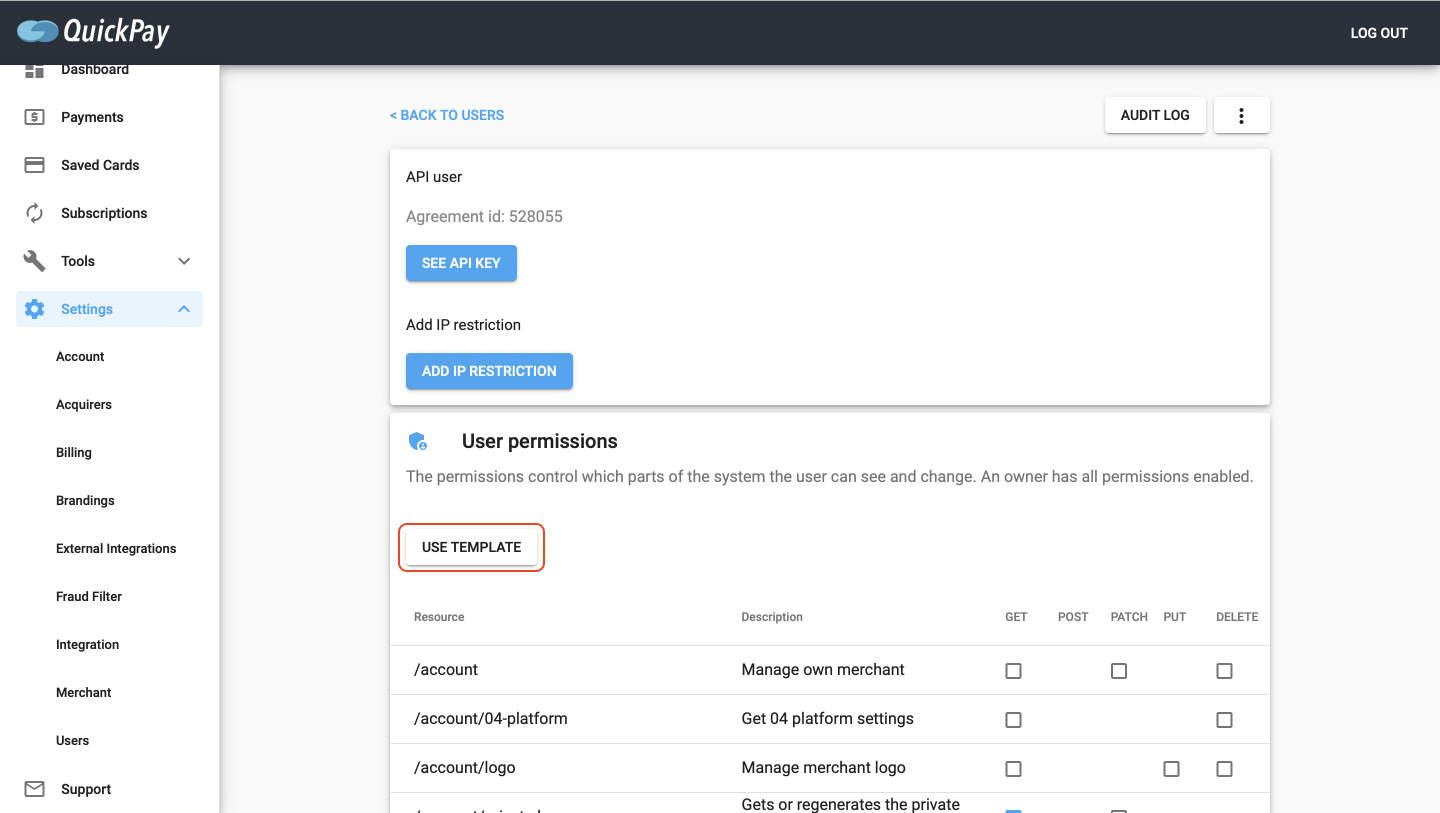
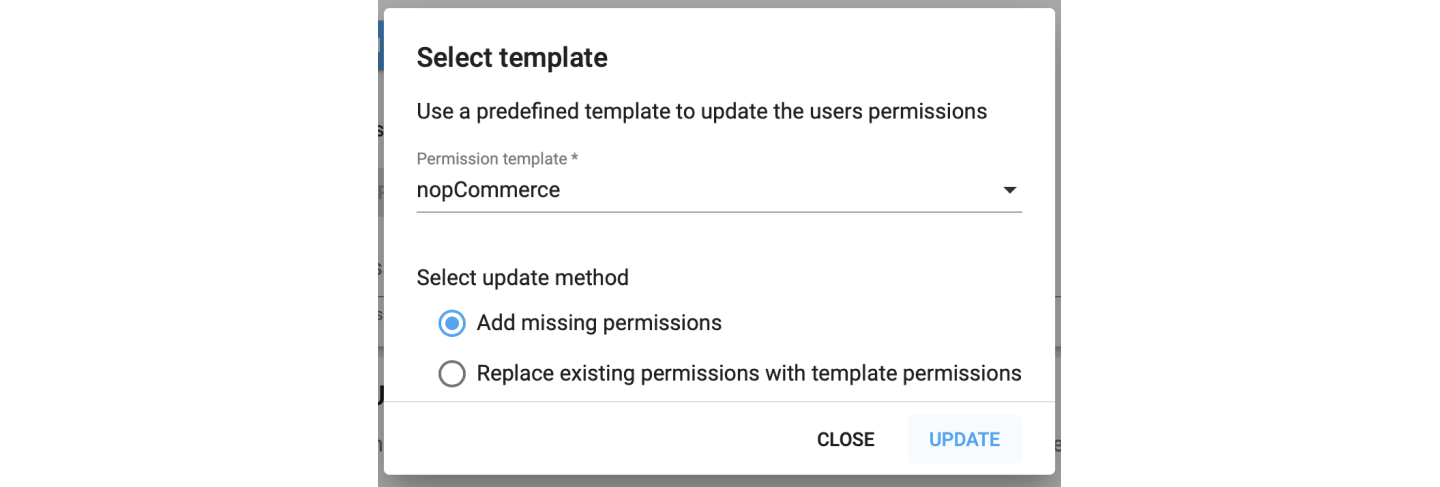
5. In Quickpay Manager, go to Setings > Users. Under System users click on “API user” and click “Use template”.
6. Under Permission template select nopCommerce and under Select update method select “Add missing permissions”. Click “Update”.
You are ready to accept payments with nopCommerce and Quickpay!
Subscriptions
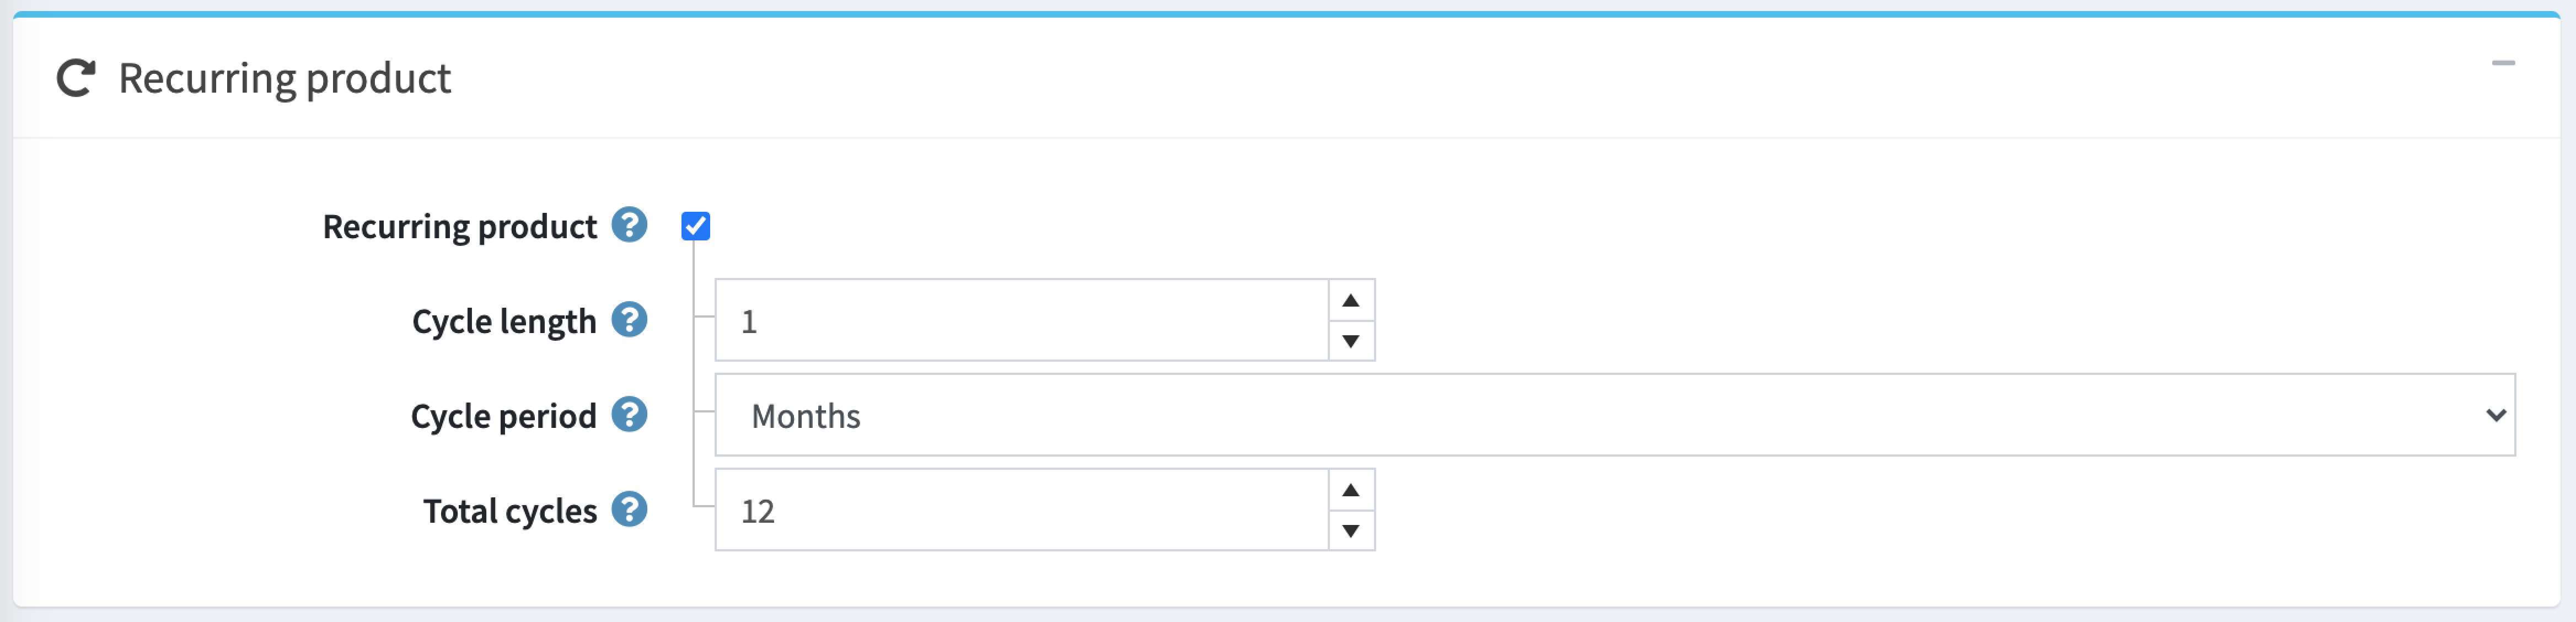
To create subscriptions in nopCommerce, you can create recurring products. When you create a new product you can specify the interval period for the subscription in the Recurring product section.
If you don’t see the Recurring product section, you can click “Settings” at the top of the page and under Panels and product species, select “Recurring product”. Then the section will appear.
When the customer pays for a subscription, they will only be able to choose from payment methods that support recurring payments. The payment is completed as a normal card payment, the only difference is that “Create a subscription” will appear in the Quickpay payment window.
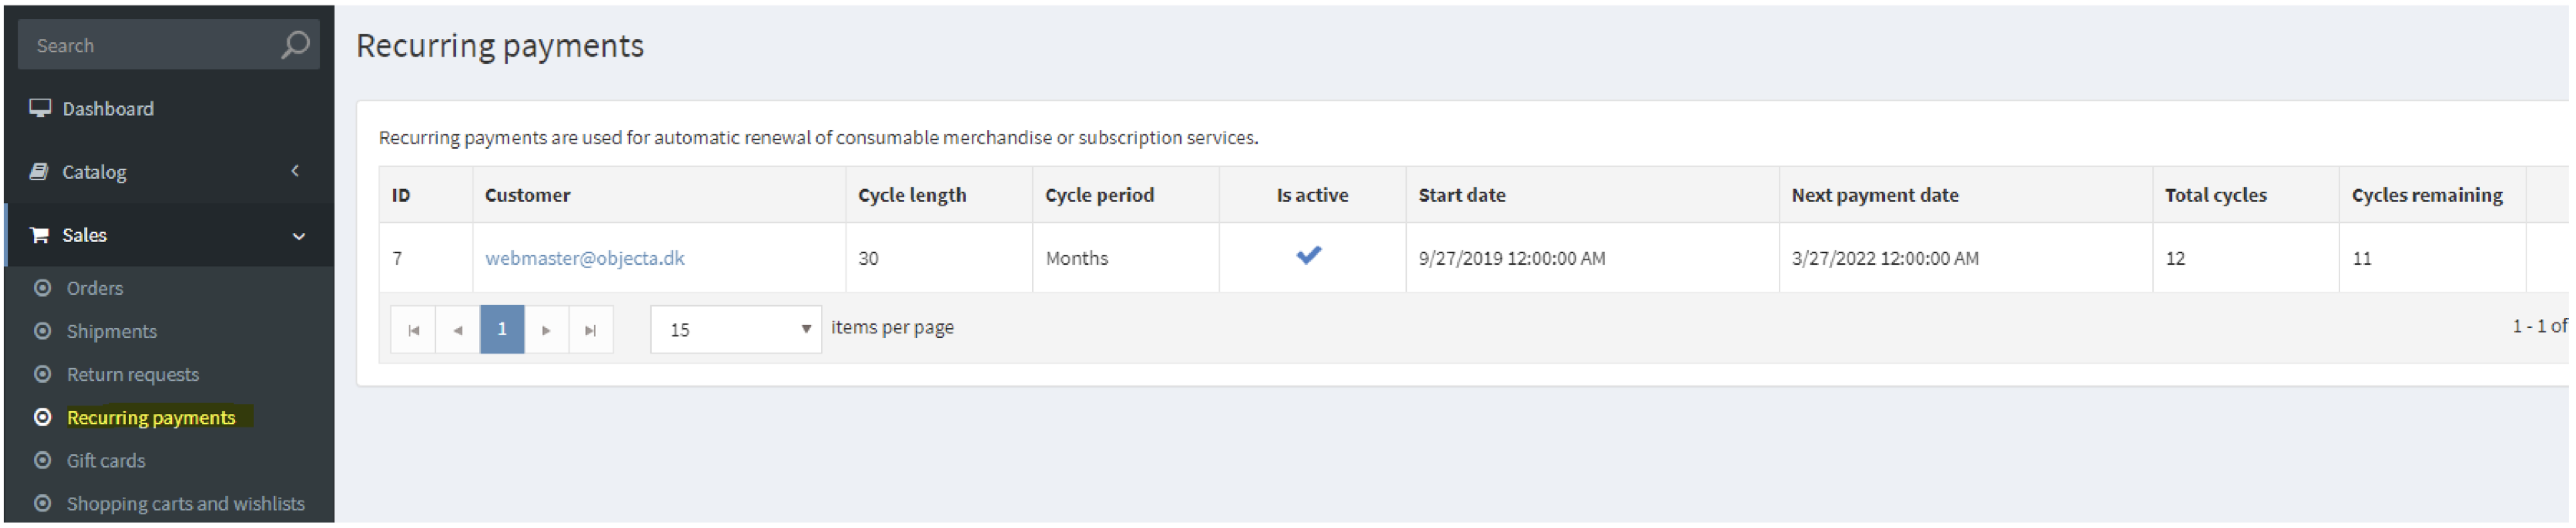
A subscription is created in two steps. First, the subscription is created in nopCommerce and at Quickpay and then the payment and related authorization in a normal Quickpay payment window are created. In nopCommerce all subscriptions are shown under Sales > Recurring payments.
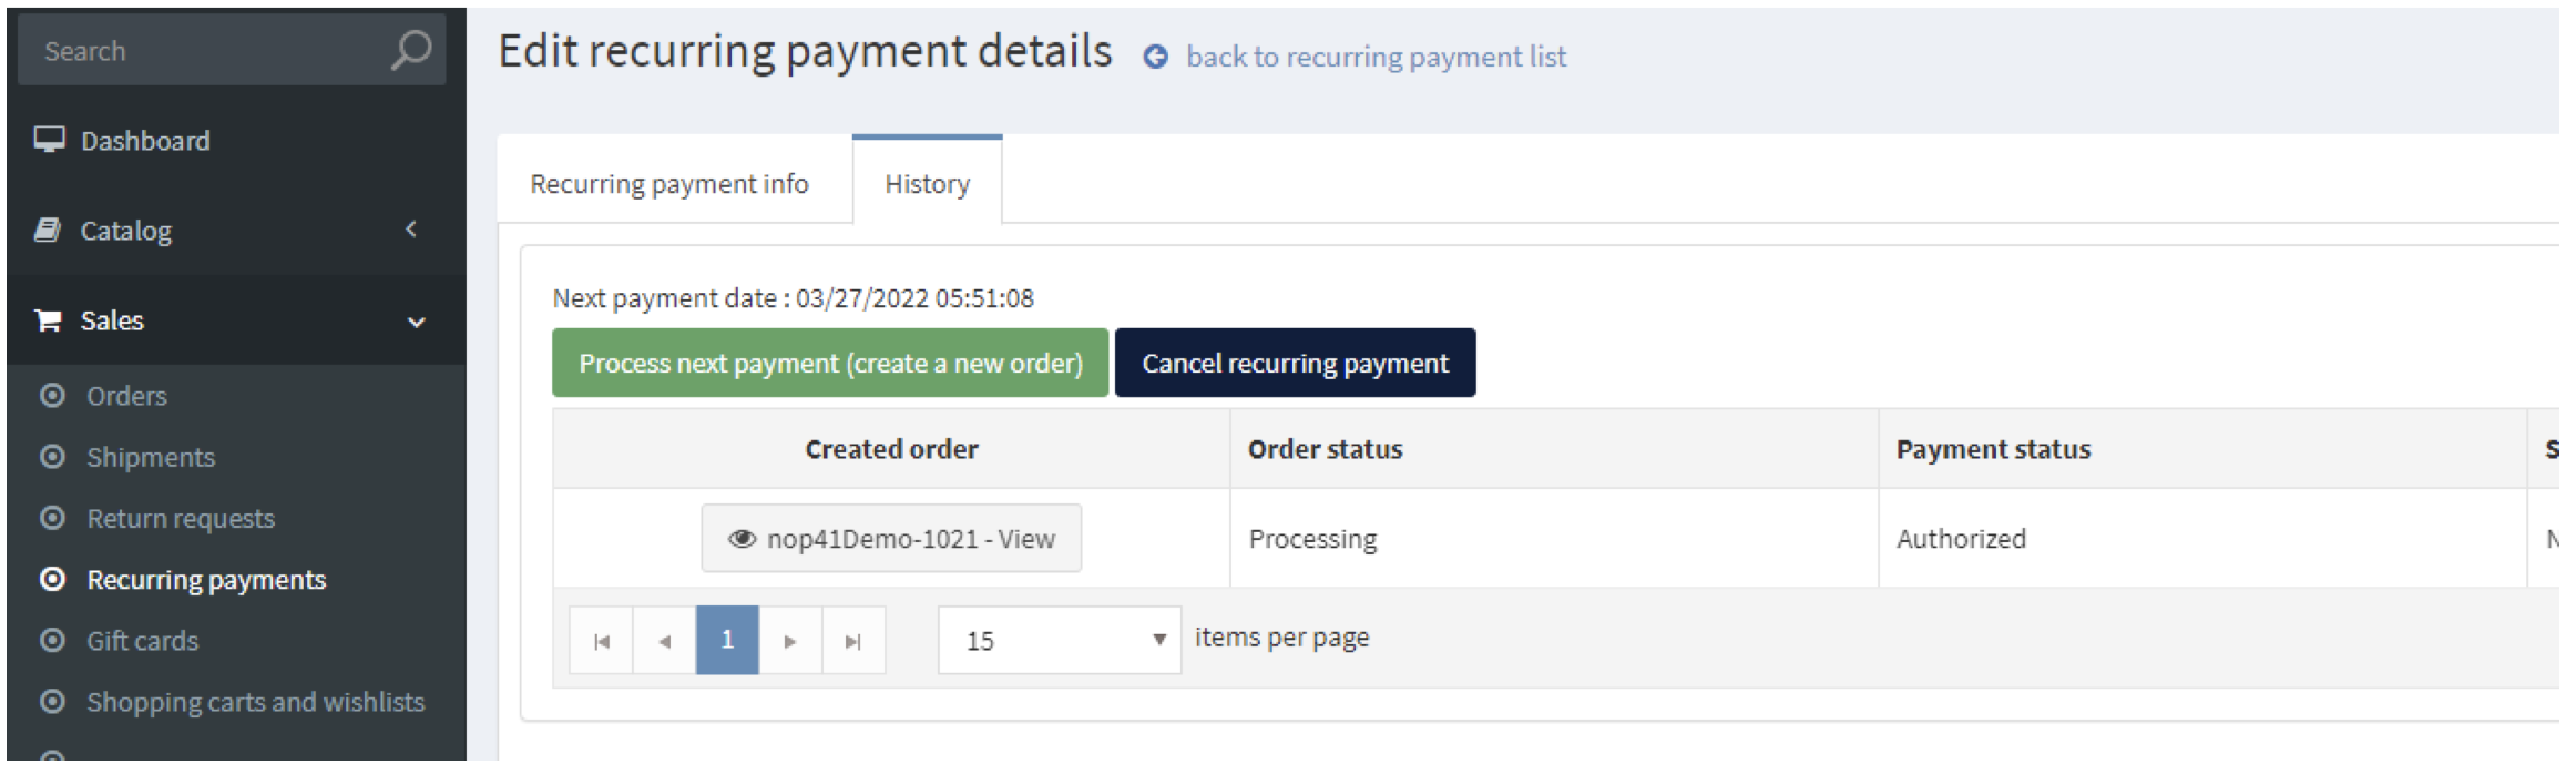
There are two types of recurring payments, automatic and manual. Quickpay supports manual recurring payments.
The shop owner needs to manually keep track of all renewals. When a subscription is due for renewal, in the payment details page, click the “Process next payment (create a new order)” button. The new order will include the original subscription product. You can also cancel the subscription here, by clicking the “Cancel recurring payment” button.
The payment will be captured automatically if the subscription order only contains digital products or product that should not be shipped or as soon as the order is shipped. Automatic capturing can be configured in Quickpay Plugin configuration in the “Auto capture” setting. This configuration is used in both the first (original) order when the subscription is created and following subscription renewals.